Playlists
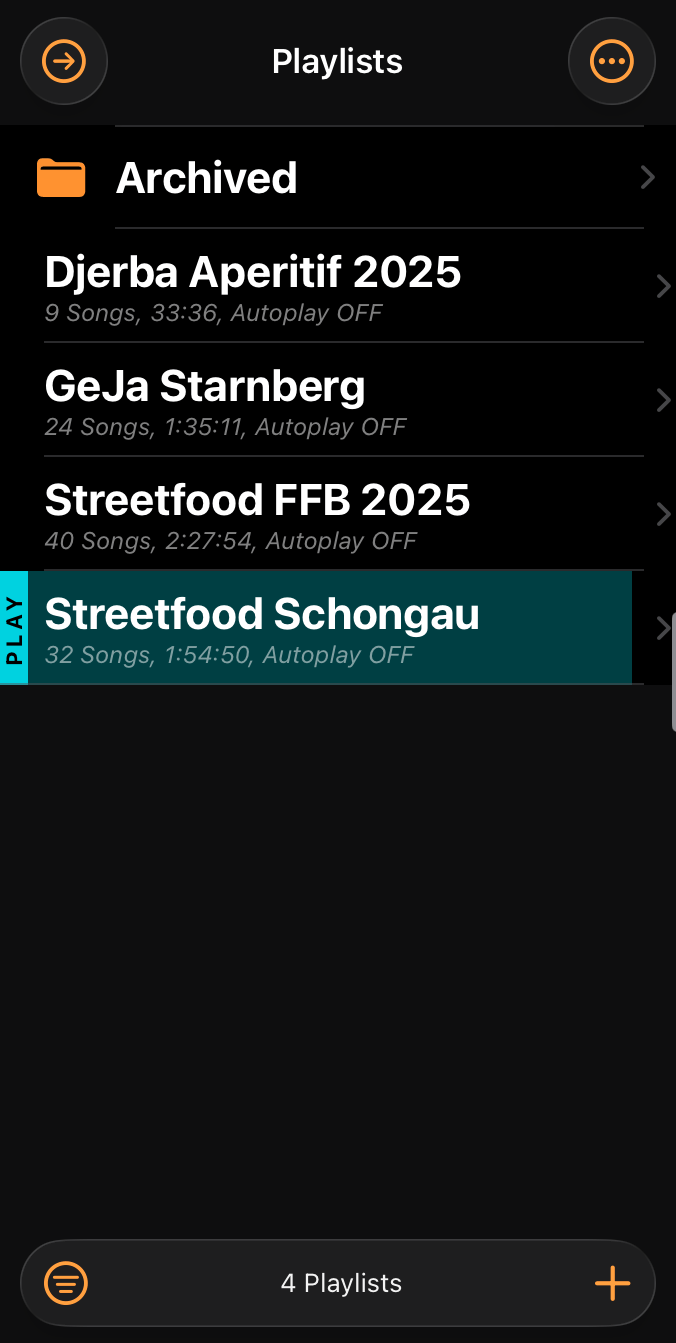
Playlists let you organize songs into collections for different performances, venues, or occasions. The Playlists sidebar shows all your playlists, displaying each playlist's name, number of songs, and autoplay setting. Tap a playlist to view and edit its contents.
Tip
If a playlist is loaded to the queue, the navigation bar shows a right arrow icon to jump directly to that playlist when you're viewing a different list.
Managing Playlists
Creating a Playlist
Tap the button in the bottom toolbar to open the New Playlist dialog. Enter a name for the playlist and optionally set a color. Enable Autoplay if you want songs in the playlist to play continuously without stopping after each song. Choose the playlist Type — Regular for a list you fill by hand, or Smart for one that fills itself from rules. Tap Save to create the playlist in the current folder.
Editing a Playlist
Select Edit from the context menu or tap the icon in the left swipe menu. You can change the playlist's name, color, type, and autoplay setting. You can also manage keywords for the playlist, which works similarly to editing keywords for songs.
Duplicating a Playlist
Select Duplicate from the context menu or tap the icon in the left swipe menu to create a copy of the playlist.
Deleting a Playlist
Select Delete from the context menu or tap the icon in the left swipe menu. Stage Traxx asks for confirmation before the playlist is deleted, so a mistap during a show cannot cost you a set list.
Note
Deleting a playlist never deletes the songs it contains.
Smart Playlists
A smart playlist has no fixed contents. Instead it holds a filter, and every song in your library that matches the filter appears in it automatically. Add a song that matches and it shows up; change a song so it no longer matches and it disappears. Smart playlists are marked with SMART in the sidebar and navigation bar of the playlist.
Create one by choosing Smart as the playlist type in the New Playlist dialog, or convert an existing playlist by changing its type in the edit dialog.
Filter Rules
Tap Filter Rules in the playlist dialog to build the filter. Choose whether songs must match All rules (AND) or Any of them (OR), then add one rule per condition.
Rules can use Title, Artist, Notes, BPM, Year, Duration, Track Count, Play Count, Key, Capo, Color, Date Added, Last Played, Keyword and Folder. The rule editor works exactly like the one described under Filtering Songs.
Example
- Key is G — a rehearsal list of everything in one key
- Date Added is in the last 30 days — everything new this month
- BPM is between 90 and 120 — mid-tempo material for a dance set
- Keyword includes all
worshipand Play Count is 0 — tagged songs you have never played
Song Limit
Optionally cap how many songs the playlist returns. Leave the field empty for no limit. Combined with a sort order, a limit gives you lists like "the 20 most recently added songs".
Working with Smart Playlists
Because the contents are derived from the filter, a smart playlist behaves slightly differently from a regular one:
- You cannot add, remove, or reorder songs by hand, and there is no per-song playback mode.
- The sort order determines the order songs are queued in.
- Everything else works as usual: load the playlist into the queue, share it, and use it during a performance.
Converting Between Types
Switching a playlist between Regular and Smart is possible at any time, and Stage Traxx confirms the change first because contents are affected:
- Smart to Regular: The songs currently matching the filter are written into the playlist as real entries. From then on the list stays as it is and can be edited by hand.
- Regular to Smart: The manually added songs are discarded and replaced by the filter results.
Adding a Playlist to the Queue
- Play Next: Replaces the queue with the contents of the playlist. Available in the context menu or via the icon in the right swipe menu.
- Add to Queue: Appends the playlist to the end of the queue. Available in the context menu or via the icon in the right swipe menu.
Sorting Playlists
Sort options are available in the More Options menu in the navigation bar. You can sort by name or date added, in ascending or descending order.
Filtering Playlists
Toggle the filter with the filter icon in the bottom toolbar. This allows you to quickly switch between filtered and unfiltered views. Tap Filtered by to configure the filter, which opens a dialog where you can filter playlists by color and keywords.
Folders
Playlists can be organized in a folder hierarchy. Folders can contain subfolders with no limit to the depth.
- Create a folder: Select Add Folder from the More Options menu in the navigation bar.
- Move to a folder: Select Move to Folder from the context menu or tap the icon in the left swipe menu. Select Root to move the playlist back to the root level.
- Rename a folder: Select Rename from the context menu or tap the icon in the left swipe menu.
- Delete a folder: Select Delete from the context menu or tap the icon in the left swipe menu. Only empty folders can be deleted.
Editing Playlist Contents
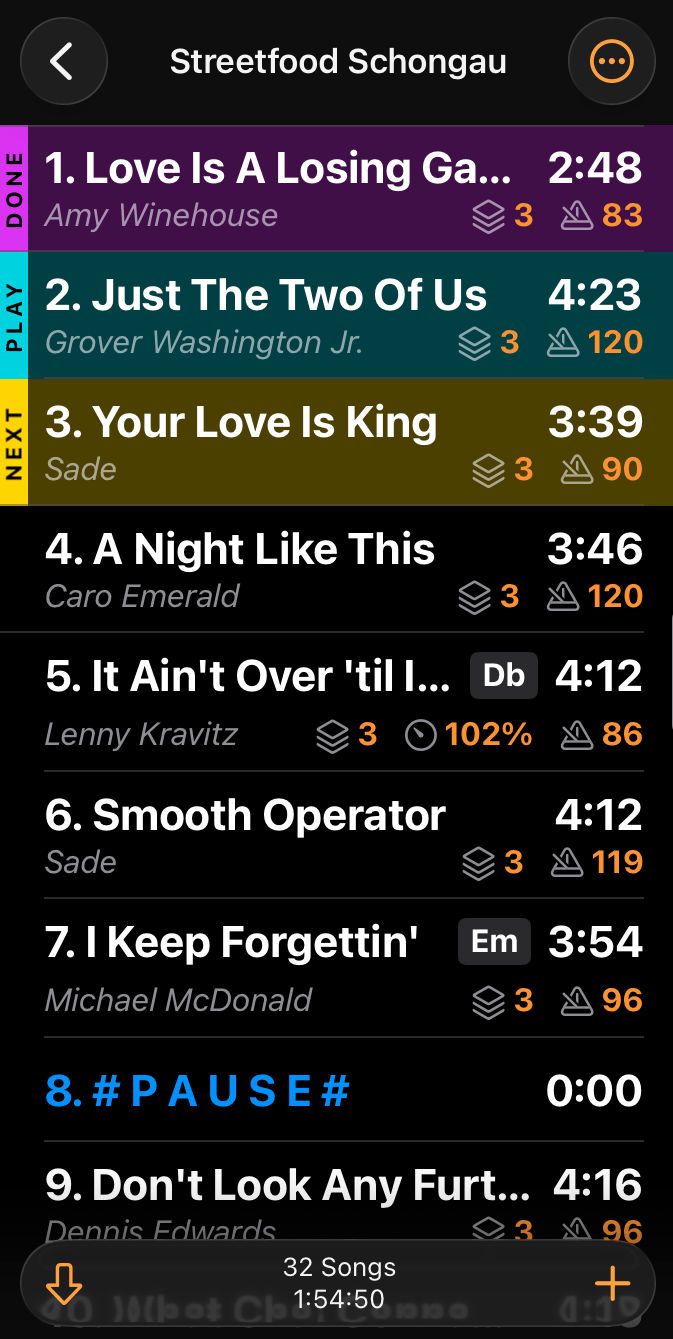
Tap a playlist to open it and view its contents. The bottom toolbar shows the number of songs and total playback duration. Tap a song to load it into the player and queue the remaining songs.
Tip
When automatic queue handling is disabled, double-tap a song to quickly add it to the queue.
You can number songs by enabling Show Song Numbers in the More Options menu in the navigation bar. The search box above the first song finds songs by title or artist within the playlist and supports the same search syntax as the songs list.
Adding Songs
Tap the button in the bottom toolbar to open the Song Picker. The picker shows all songs in your library with the same filter, sort, and search options as the Songs view. Songs already in the playlist appear grayed out but can be added again if needed.
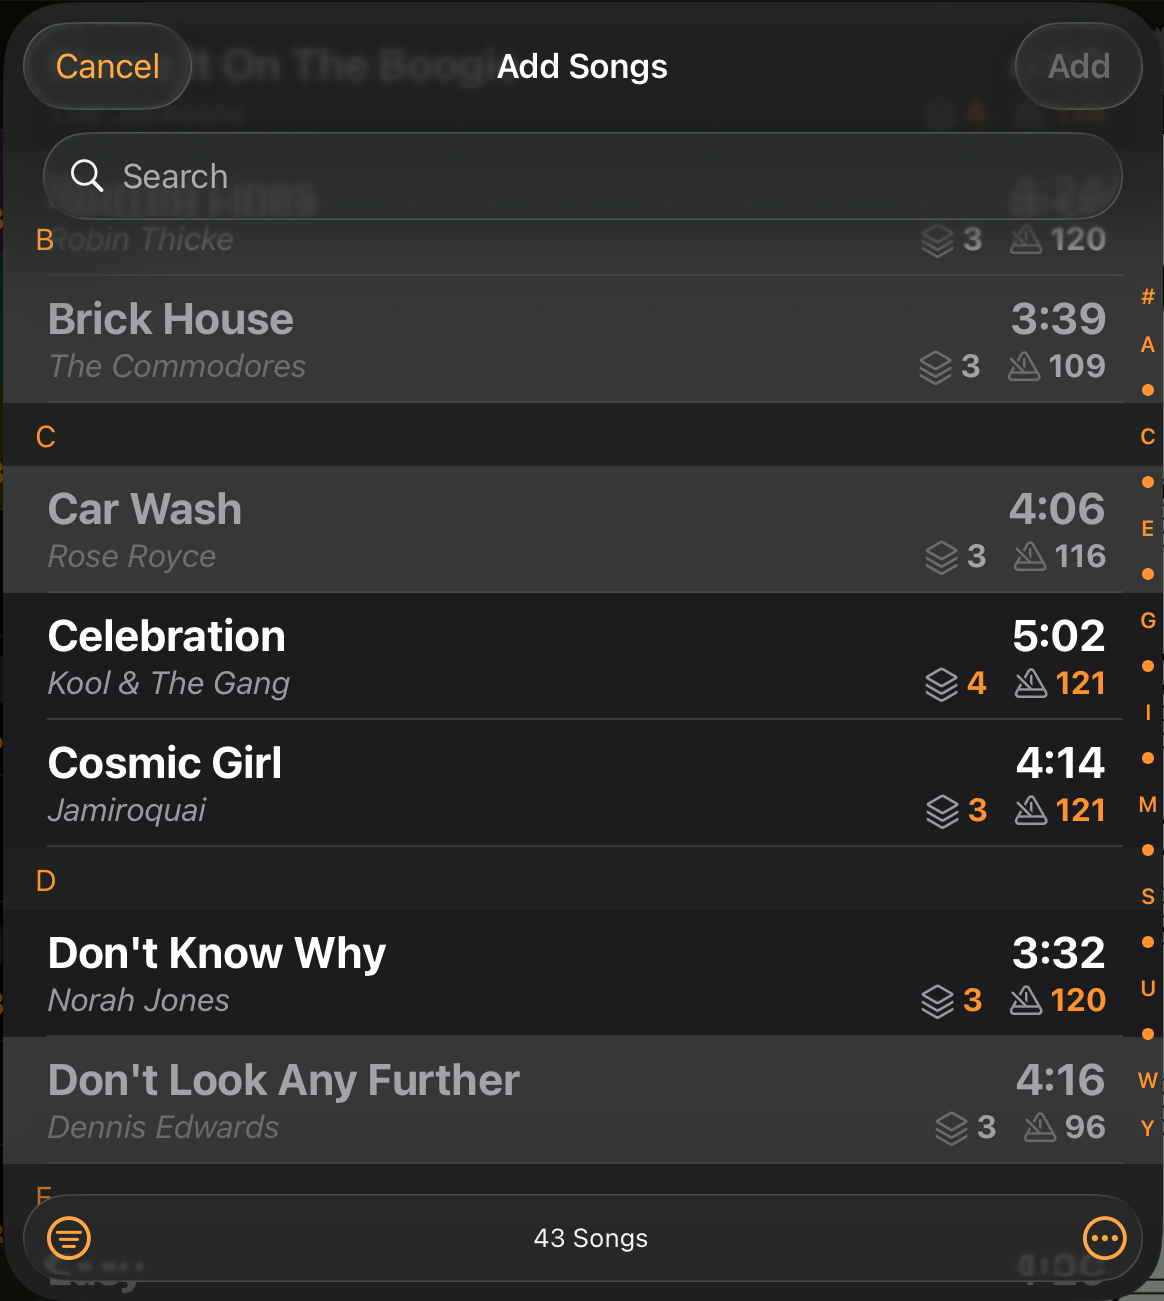
Use Select All or Deselect All in the More Options menu to toggle selection. Set the Insert Position option to control where songs are added: at the top, bottom, or after the currently playing song. Tap Add to add the selected songs to the playlist.
Removing Songs
Select Remove from Playlist from the context menu or tap the icon in the left swipe menu. Stage Traxx asks for confirmation before the song is removed, so a mistap during a show cannot cost you an entry. The song itself stays in your library.
Reordering Songs
Drag and drop songs using the drag handle to reorder them manually.
Sorting the Contents
Two different sort functions are available in the More Options menu in the navigation bar.
Sort By
A non-destructive live sort. Pick a field and a direction and the playlist is displayed — and queued — in that order, while your manual order is kept untouched underneath. Select Manual to switch the sort off again and get your own order back.
This is the one to use during a show: sort by title to find something quickly, then go back to Manual without having lost your set order.
Note
Smart playlists have no manual order, so the Manual option is not offered for them.
Rearrange Manually
A one-shot rearrangement that permanently rewrites the saved order. It offers Title A-Z, Title Z-A and Shuffle, and switches off any active automatic sort.
Warning
Rearrange Manually replaces your manual sort order and cannot be undone.
Note
In a playlist with sets, rearranging sorts each set separately. Songs never move across a set boundary, so shuffling a gig cannot fling a song over the interval.
Sets
A playlist can be divided into sets — the two halves of a gig either side of the break, a main set and an encore, or one block per band that shares the evening. Sets are shown as headers in the playlist, each with its own song count and running time, and are numbered automatically as Set 1, Set 2 and so on.
Creating Sets
- Add Set in the More Options menu appends a set. On a playlist without sets, this first split divides it into Set 1 and Set 2.
- Insert Set After in a song's context menu starts a new set right after that song. Everything below it in the same set moves into the new one — the fastest way to mark where your break falls in an existing list.
Removing Sets
Swipe left on a set header or use its context menu and select Delete Set. The songs are not deleted: they merge into the set above.
Adding a Set to the Queue
Swipe right on a set header or use its context menu to queue just the songs of that set:
- Play Next: Replaces the queue with the songs of the set and applies the playlist's autoplay setting. Use this to load the next part of your show in one step.
- Add to Queue: Appends the songs of the set to the end of the queue.
Working with Sets
- Songs can still be dragged across set boundaries, so moving a number from the first half to the second is just a drag.
- With automatic queue handling enabled, tapping a song inside a set queues only that set's songs. Playback stops at the end of the set instead of running on into the break — which is exactly what you want when the next thing on the schedule is 20 minutes off stage.
- Rearrange Manually sorts within each set, never across them.
Note
Set names are derived from their position and cannot be edited. Adding or deleting a set is a host-only operation and is not available to network clients.
Adding Songs to the Queue
- Play Next: Adds the song to the top of the queue. Available in the context menu or via the icon in the right swipe menu.
- Add to Queue: Adds the song to the bottom of the queue. Available in the context menu or via the icon in the right swipe menu.
- Add from Here: Adds the selected song and all following songs to the bottom of the queue. Available in the context menu.
Autoplay and Loop
By default, playback stops after each song. The title area shows the playback mode for the current song and can be tapped to change it.
You can enable autoplay for the entire playlist with the button in the bottom toolbar, which plays all songs continuously without pausing. To control playback per song, select Toggle Autoplay from the context menu or tap the icon in the left swipe menu.
To loop a song, select Toggle Loop from the context menu or tap the icon in the left swipe menu. The song repeats until you disable loop in the title area.
Sharing a Song
Select Share from a song's context menu to export that single song as a Stage Traxx song archive, the same way as in the Songs view.
Sharing a Playlist
Select Share Playlist from the More Options menu in the navigation bar to choose a sharing format:
- Plain Text: A text file listing the playlist contents.
- Playlist File: A Stage Traxx playlist file that can be imported into another Stage Traxx instance. Songs are matched by title and artist, so songs missing from the target library will be skipped.
- Playlist with Songs: A complete archive containing the playlist and all song assets. This can fully restore the playlist and songs on another device but may be quite large.
Batch Editing Songs
Enable batch edit mode by selecting Batch Edit from the More Options menu in the navigation bar. Select songs by tapping the circle indicator to the left of each song, or use Select All / Deselect All in the navigation bar.
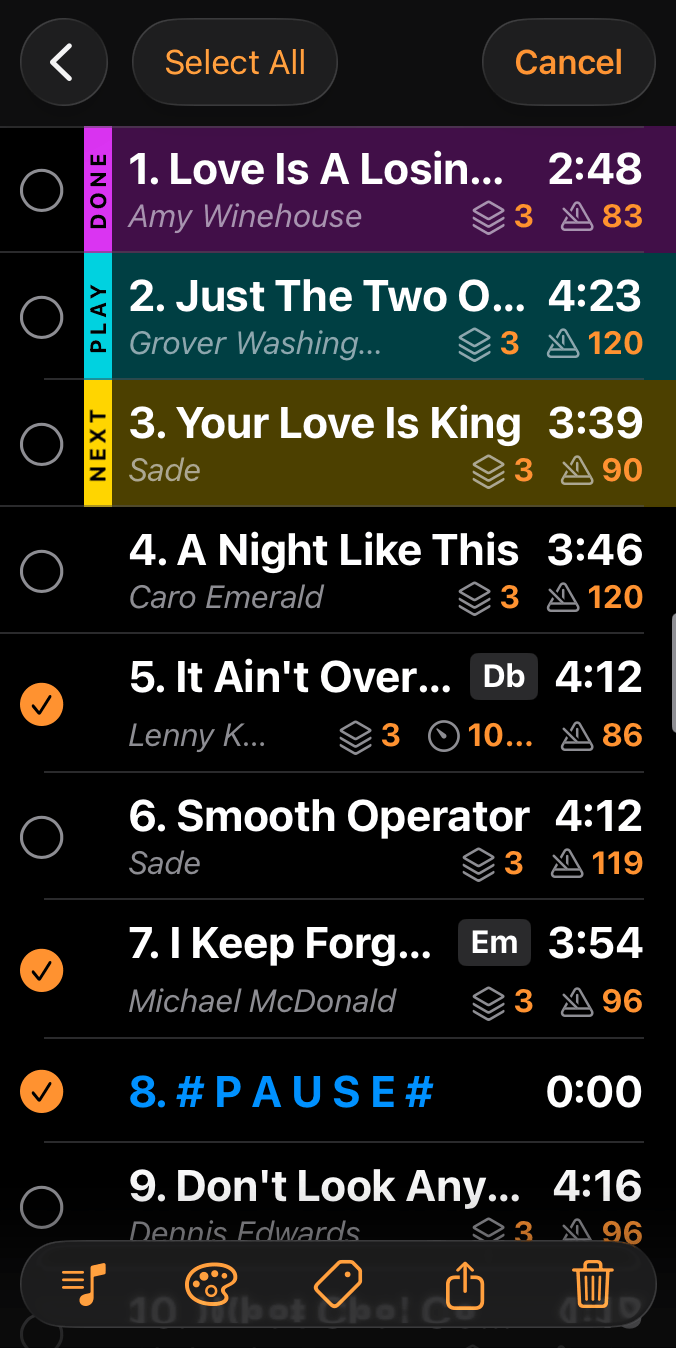
To reorder songs in batch edit mode, select the songs you want to move, then drag them to the desired position using the drag handle of any selected song. All selected songs move together.
The bottom toolbar provides these actions for selected songs:
- Add to Playlist: Add songs to another playlist
- Color: Change the song title color
- Keywords: Edit keywords for selected songs
- Share: Export songs as a Stage Traxx song archive
- Remove: Remove songs from this playlist