Regions
The Regions tab lets you divide a song into sections and assign playback behaviors to each. This is useful for visualizing song structure and for rearranging songs on the fly during performance.
For details on playback modes and interacting with regions during playback, see Playback > Audio Regions.
The view is divided into a large waveform view in the top half and a region details section in the bottom half. The navigation bar includes undo/redo buttons for editing.
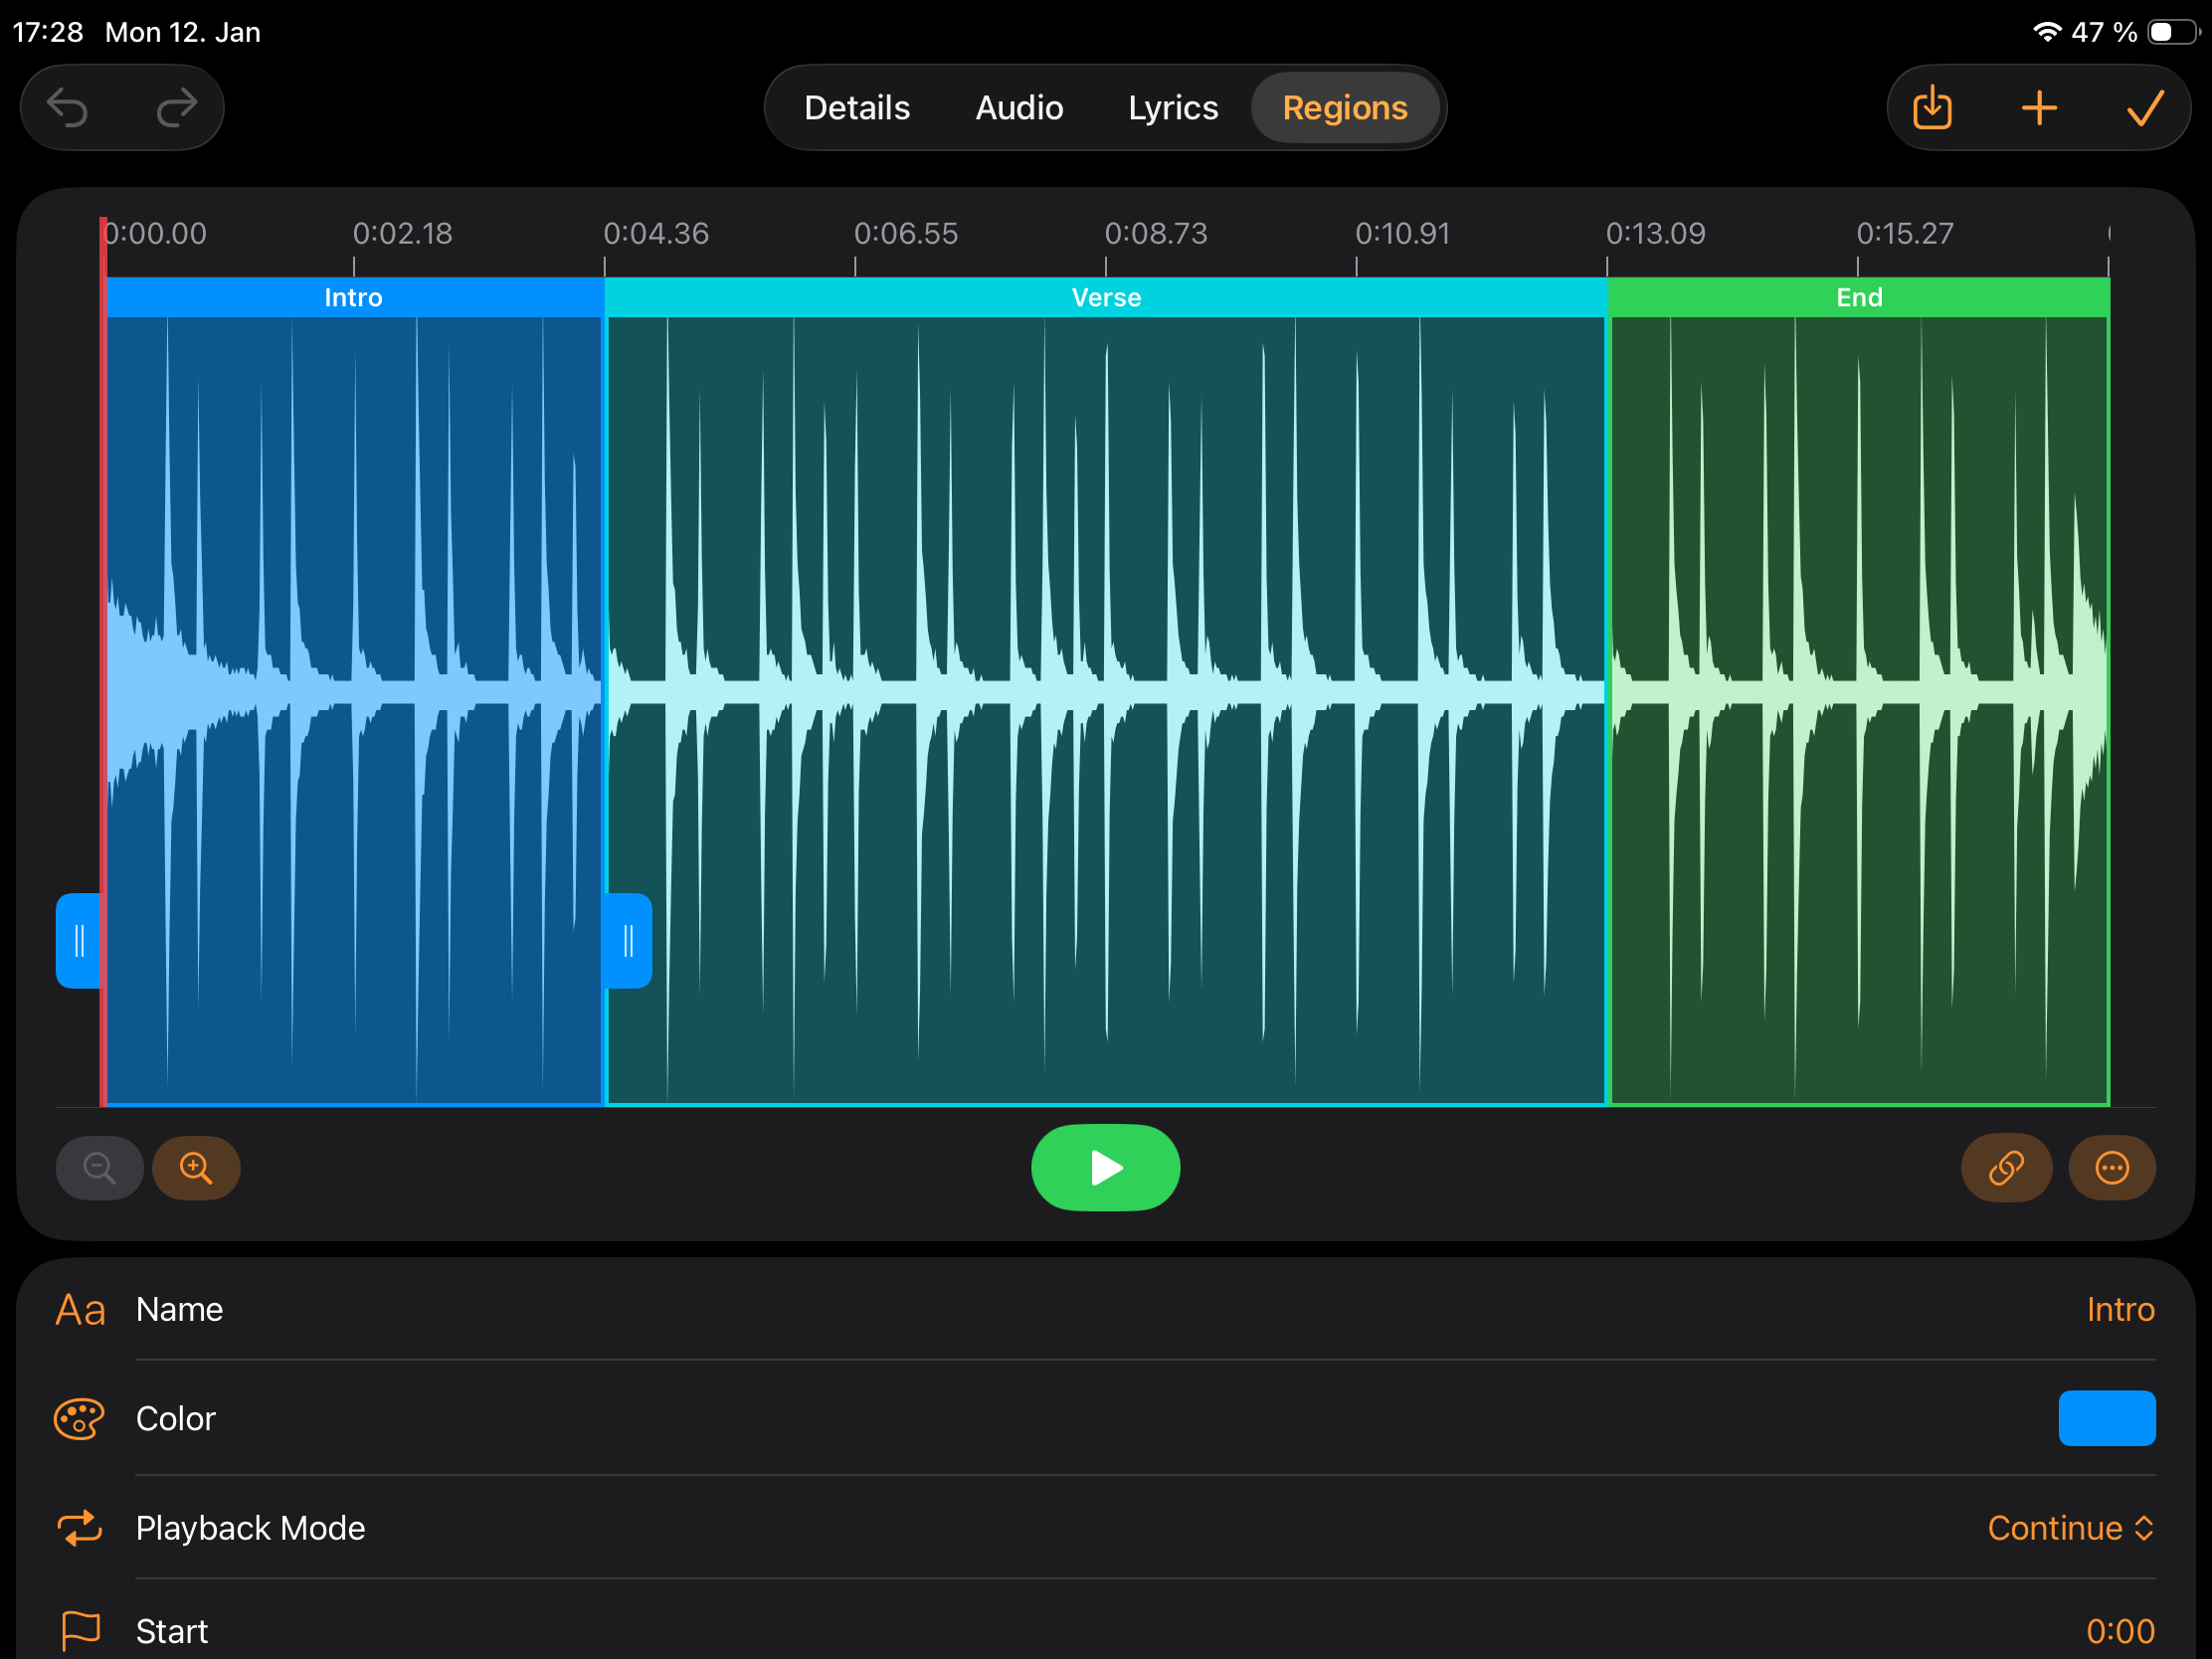
To create a new region, tap the plus button. The region is created at the current playhead position (the red vertical line), or at the nearest beat when Snap to Grid is enabled. Regions cannot overlap — if the playhead is within an existing region, the new region is created after the current one ends.
When you have defined more than one region preset, the plus button opens a menu instead, letting you pick the preset the new region should be based on. The playback position is captured the moment you press the plus button, not when you pick the preset — so you can take your time choosing, and even let the song keep playing, and the region still starts exactly where the playhead was.
Tip
This makes it practical to mark up a song while it plays: hit plus on the downbeat of each section, then pick the matching preset from the menu at your leisure.
Tip
Set up an assignable action for start/stop to improve editing speed in this editor.
Tip
Logic Pro, Reaper and Cubase 14 or newer can export markers in WAV, AIF, or CAF files. If Stage Traxx detects markers, it displays an import button in the navigation bar to convert them into audio regions. See Importing Markers below.
Waveform View
The red vertical line represents the playhead and shows the current playback position. Tap or drag in the time ruler to seek to a specific position.
Zooming and Scrolling
Zoom the waveform using the and buttons below the waveform (which zoom centered on the playhead), use a pinch gesture to zoom around the pinch position, or drag vertically on the timeline ruler to zoom. Double-tap a region to zoom in on it, then double-tap anywhere to zoom back out.
When zoomed in, you can scroll the waveform horizontally.
Selecting and Resizing Regions
Tap a region to select it for editing. The selected region displays drag handles to adjust its left and right borders. Tap outside any region to deselect.
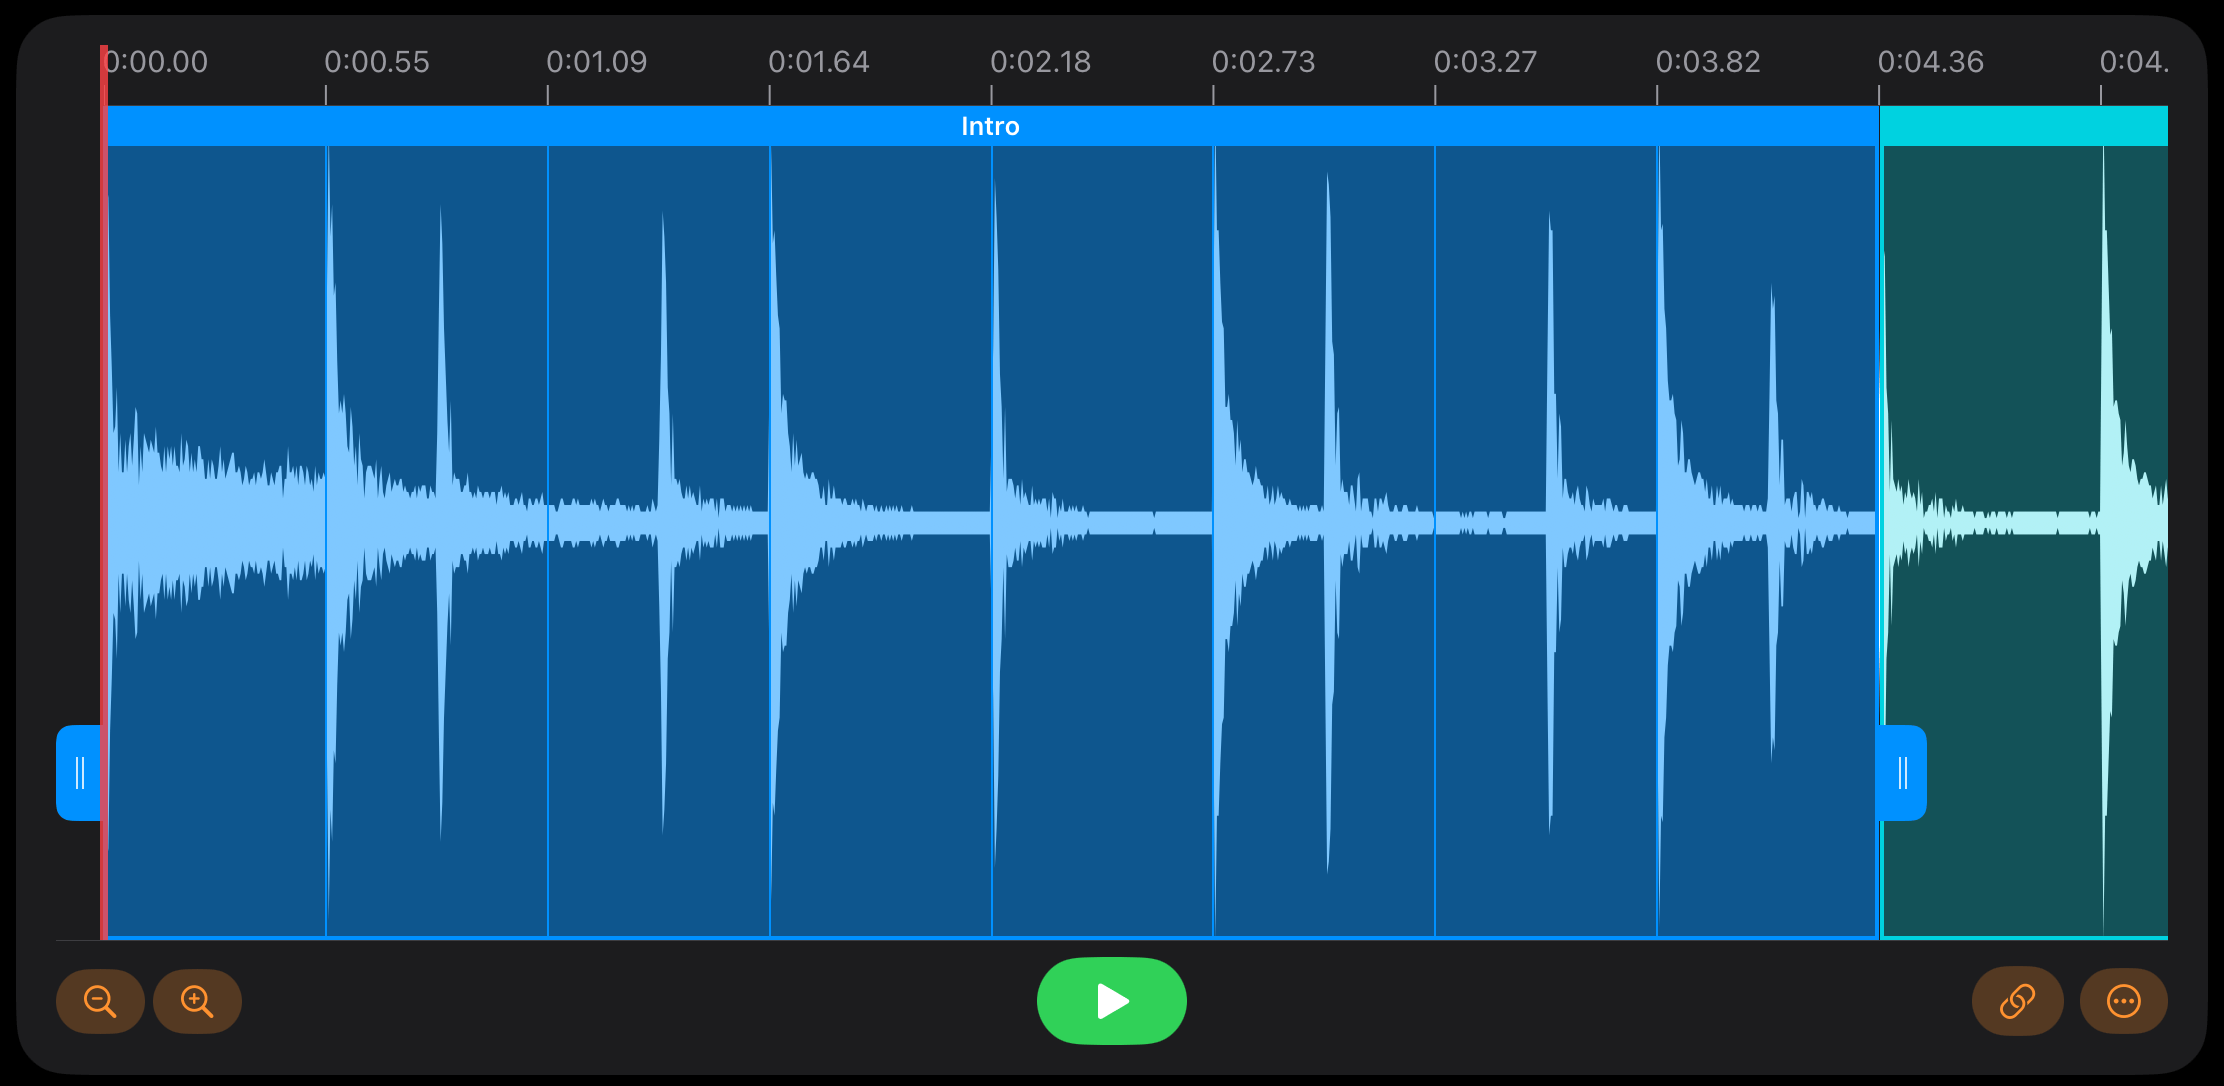
The button below the waveform locks the region duration. When enabled, moving either drag handle moves both handles simultaneously, keeping the region length constant while repositioning it.
More Options Menu
The More Options menu below the waveform provides additional configuration for the waveform view.
Preview Loops
When enabled, after you finish dragging a region handle, playback automatically starts 1 second before the region end and loops the region. This lets you preview the start and end points immediately.
Follow Playhead
When enabled, the waveform scrolls automatically to keep the playhead visible during playback.
Show Beatgrid
When enabled, displays vertical lines as beat indicators across the waveform. The grid is calculated from the song's BPM and starts at the beat anchor. It is shown whether or not a region is selected, so you can see the beat structure of the whole song while you work.
Tip
The beat grid is a big time saver for songs with a constant tempo. Line up the beat indicators with the visible peaks in the waveform and ensure regions start and end on a beat for seamless loops.
Snap to Grid
When enabled, region borders snap to the nearest beat of the grid. This applies both when you drag a border and when you create a new region: a region added with the plus button starts on the closest beat rather than at the exact playhead position, so it lines up with the music even if you tapped slightly early or late. This is the fastest way to build regions that loop cleanly on songs recorded to a click.
Disable it when you need to place a border between beats — for example on a pickup note or an unmetered intro.
Note
Snapping needs a BPM value and uses the grid defined by the beat anchor, whether or not Show Beatgrid is enabled.
Waveform Source
Select which track to use for rendering the waveform display. The default is a mixdown of all tracks.
Region Presets
A preset is a reusable template holding a name, a color and a playback mode, so you can add a fully configured region with a single tap instead of setting the same three values by hand every time.
Open the preset editor with the button in the navigation bar, to the right of the plus button. Tap Add Preset to create a preset, tap an existing one to edit it, swipe left to delete it, or drag to reorder — the order here is the order they appear in the menus. You can define up to 12 presets, and at least one must always remain.
Sensible presets mirror the sections you use most, for example:
- Intro — blue, Continue
- Chorus — green, Repeat
- Solo — orange, Repeat Once
- Outro — red, Pause
Once you have more than one preset, the plus button becomes a menu listing all presets with their colors. Pick one and the new region is created at the playhead with that name, color, and playback mode already set. You can also apply a preset to an existing region from the region details section.
Note
Presets are templates, not links. Editing a preset later does not change regions you already created from it.
Note
Presets belong to the app, not to a single song, and are synced across your devices with iCloud Sync.
Importing Markers
When you import markers from an audio file, Stage Traxx matches each marker name against your presets. If a marker is named like one of your presets — ignoring case and surrounding whitespace — the resulting region takes that preset's color and playback mode. Markers without a match become blue regions that continue into the next region. The region name always comes from the marker, never from the preset.
Name the markers in your DAW to match your presets and a whole song arrives fully colored and configured, with your choruses already looping, in a single import.
The same matching runs when you add audio files to a song that has no regions yet — the markers are converted to regions right away, without opening this editor.
Note
Using the import button replaces all existing regions of the song, so you are asked to confirm first.
Beat Anchor
The beat anchor sets where the metronome's beat grid begins. It is shown as a separate handle on the waveform and can be dragged to any position.
By default the grid starts at the song's start time, which is correct when the audio begins exactly on beat one. If your track has a lead-in — silence, a count-off, a fade, or an unmetered intro — drag the beat anchor to the first real downbeat instead. The metronome, the beat grid, and snapping then all line up with the music.
Because the anchor is independent of the start time, you can trim the song wherever you like without disturbing the beat grid.
Tip
Zoom in on the first strong transient in the waveform and place the anchor exactly on it. With Show Beatgrid enabled you can immediately check the result: the grid lines should sit on the peaks throughout the song.
Note
The beat anchor requires a BPM value for the song. Moving it can be undone with the undo button in the navigation bar.
Region Details
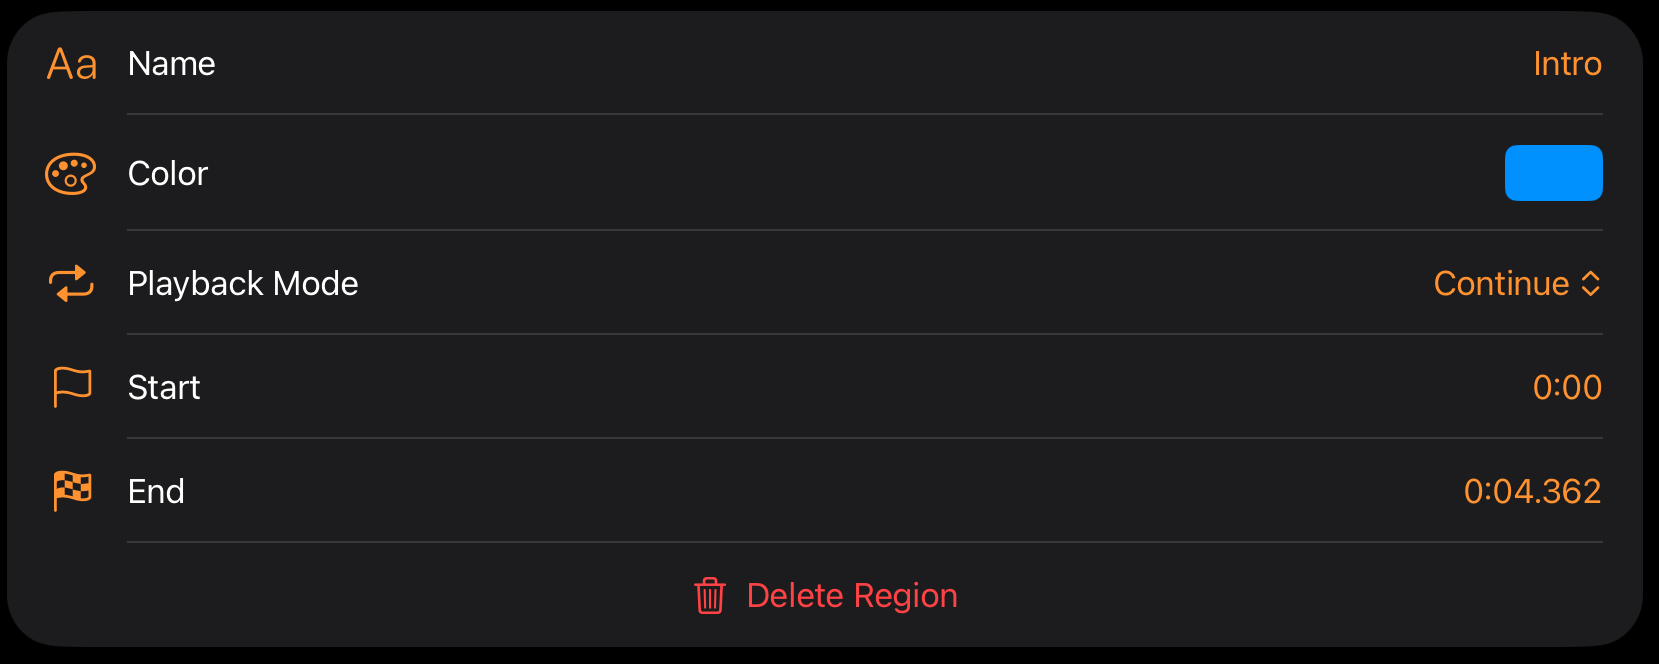
The region details section appears when a region is selected.
Name
The region name, displayed in the region controls and the waveform view.
Applying a Preset
The button to the right of the name field applies a region preset to the selected region, overwriting its name, color, and playback mode in one step. The start and end times are left untouched — only the template part of the preset applies to a region that already exists.
This is the quickest way to correct a region you created from the wrong preset, or to configure imported regions whose marker names did not match any preset.
Note
The button only appears when you have defined more than one preset.
Color
The region color, used in the region controls, waveform view, and progress bar.
Playback Mode
Select how playback should continue when reaching the end of the region:
- Continue — Plays the region normally and continues to the next region.
- Repeat Once — Repeats the region once (playing it twice) before continuing.
- Repeat — Repeats the region indefinitely until you manually advance.
- Skip — Jumps over the region entirely.
- Pause — Stops playback at the end of the region.
Region Cue
Assigns this region to one of six cue slots. Cue slots give a region a fixed identity that a remote control or assignable button can address directly, so you can jump straight to it during a performance — no scrolling through regions, no matter how many the song has.
Two remote actions exist for each slot:
- Jump to Region Cue 1–6: Seeks to the start of the region holding that cue immediately.
- Arm Region Cue 1–6: Behaves exactly like tapping the region's button in the top panel — selects it so playback moves there at the end of the current region, and cycles its playback mode on repeat presses.
Because the slots are numbered rather than named, the same foot switch can mean "jump to the chorus" in every song, as long as you assign cue 2 to the chorus region in each of them.
Select None to remove the cue assignment.
Note
Each cue can only be held by one region per song. Assigning a cue that another region already holds moves it — the menu shows which region currently owns each cue.
Start
The region start time with millisecond precision.
End
The region end time with millisecond precision.
Delete Region
Deletes the region.