Cloud Sync
Starting with version 3.7 Stage Traxx can automatically sync the data on all devices running with the same AppleID. This includes all audio and pdf files as well as all playlists, lyrics and other edits you make on songs. All app settings that are not specific to a device (like for example audio routing or screen size specific settings) are also synced to all your devices.
Syncing is done while your device is online. All changes are tracked when your device is offline and sent to the cloud once you are online again.
If you want to use Cloud Sync you need to make sure that you are logged in to iCloud on your device and that you have enough storage available in iCloud to store all your Stage Traxx audio files. You can check how much space Stage Traxx needs by opening your device Settings, then selecting General and then iPad Storage or iPhone Storage.
Tip
If you need to clear up space in iCloud you could remove Stage Traxx from your iCloud based device backups. When everything is synced to iCloud there is no immediate need to include Stage Traxx in the iCloud backup. To disable it, open your iPad or iPhone settings, tap on your Name then select iCloud and then iCloud Backup. Here you need to select your device and then you can exclude Stage Traxx from the backups of the selected device.
Working with iCloud Sync
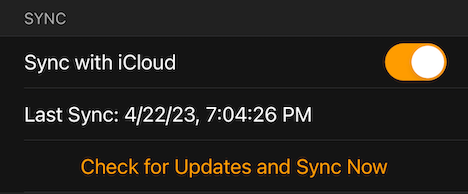
To enable Cloud Sync you need to open the Settings tab and scroll down to the section called Sync. Now enable the entry Sync with iCloud:
Any change to this entry requires a restart of Stage Traxx. The app will terminate automatically after you confirm the change.
When you enable cloud sync on your first device, Stage Traxx will upload all data from your device to the cloud once you start Stage Traxx again.
Once there is data in the cloud, enabling Cloud Sync on any additional device will wipe all data from that device before Stage Traxx is stopped and when you start it again it will start to download the data from the cloud. You will see a warning telling you that the local data is deleted when you enable Cloud Sync in this case.
You can monitor the syncing status on the Settings tab below the Sync with iCloud entry. The number of files being uploaded and downloaded is displayed here while a sync operation is running. Once syncing your device with the Cloud has finished you will see the timestamp of the last successful sync. In case of an unsuccessful sync, a short error message is displayed after the timestamp.
In case you do not see changes you made on another device you can initiate a manual sync by tapping on Check for Updates and Sync Now. This will detect and upload any local changes as well as download any changes from the cloud.
You can disable Sync with iCloud at any time. The data will be kept on your device.
Removing data from iCloud
If you decide to no longer use the Cloud Sync feature you can completely remove all data from iCloud. First you have to disable Sync with iCloud on ALL your devices. Once this is done, you can either tap on the Delete iCloud Data that is visible when the sync feature is disabled:

Or you can open your device Settings > select your name > iCloud and tap on Manage Account Storage. Now select Stage Traxx 3 in the app list and tap on Delete Data....
After this step, it is possible to enable Cloud Sync again. When you do that, the first device where you enable the feature will be uploaded to the cloud and all following devices will download the cloud data.
Troubleshooting Syncing Problems
Please note that if you work with 2 devices at the same time, the passive device receiving changes might not immediately display them. These changes are usually visible if you change to a different screen in Stage Traxx.
If you do not see any changes on a device, you could try to open Settings and then tap on Check for Updates and Sync Now.
If syncing seems to be completely broken the best option to get it working again is to reinstall the app and enable Cloud Sync right away after reinstalling. This will download all available data from the cloud.
If all this fails, open Settings and tap on Create Support Email.... This will setup an email with attached log files that can help identify the problem.